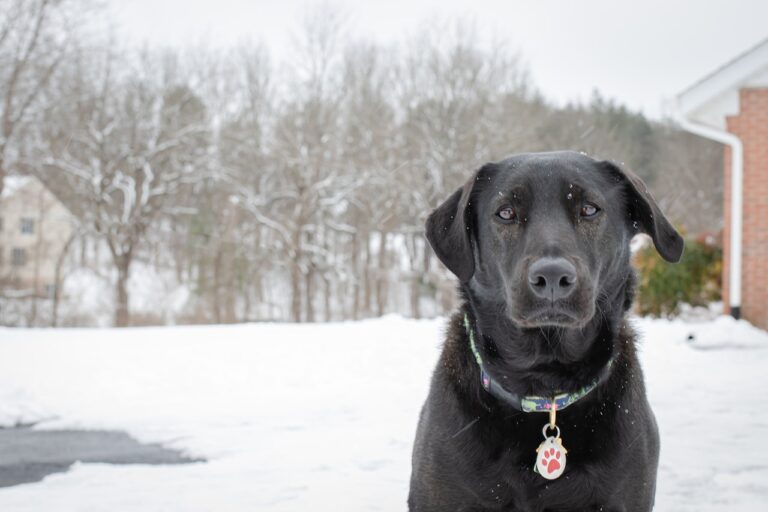
Taming the Paws: How To Restrain A Labrador for Nail Clipping
As the proud parent of a playful and energetic Labrador, I understand the joy these furry friends bring into our lives. But along with their boundless enthusiasm comes certain responsibilities, one of which is to ensure their nails are well maintained. You might wonder, “How to restrain a Labrador for nail clipping?” Well, you’re not alone!
Nail clipping is more than just about aesthetics. It’s an essential part of your Labrador’s health and well-being. Overgrown nails can cause discomfort, affect your dog’s gait, and even lead to painful injuries. But let’s face it, nail clipping could be daunting, especially with our active and sometimes overly excited Labradors.
In this article, we aim to ease your worries and equip you with practical advice and easy-to-follow steps on safely and effectively restraining your Labrador for nail clipping. From understanding your Labrador’s nail structure, and choosing the right tools, to dealing with potential problems, we’ve got you covered. By the end of this guide, you’ll feel more confident and prepared to take on this necessary grooming task.
Understanding Your Labrador’s Nail Structure
The anatomy of your Labrador’s nails is more complex than you might think. Much like a human’s, a dog’s nail consists of two primary parts: the outer shell and the inner quick. The outer shell is hard and pigmented, acting as a protective layer. It’s made of keratin, a protein that forms human hair and nails. This part of the nail is what you’ll be trimming.
But here’s where the comparison to our nails ends. Inside this hard exterior lies the quick, soft, sensitive core that plays a significant role in your Labrador’s nail health and comfort. To visualize this, imagine a pencil. The wood casing resembles the outer shell, while the lead at the center resembles the quick.
🐾Understanding the Quick and Its Importance
The quick is essentially a bundle of nerves and blood vessels. It nourishes the nail and can cause considerable discomfort if accidentally cut or damaged. The quick is easy to spot in light-colored nails as a pinkish area within the nail. However, for Labradors with darker nails, the quick is more challenging to identify, making nail clipping a task requiring careful attention.
Accidentally cutting into the quick is a common fear among dog owners, and understandably so. It can cause your pet significant pain and result in bleeding. It is why understanding the structure of your dog’s nails and the location of the quick is paramount.
For instance, if you’re unsure about the quick’s location, a rule of thumb is to make small cuts starting from the nail tip, gradually moving towards the base. This method ensures you’re less likely to reach the quick, minimizing the risk of hurting your pet.
🐾The Right Tools for the Job
Before you decide to undertake the task of clipping your Labrador’s nails, it’s crucial to ensure you have the right tools at your disposal. Here’s what to use to clip dog nails:
➡Nail Clippers: There are two main types of dog nails clipper – guillotine and scissor styles. The guillotine style is easier but might not be as effective for larger breeds like Labradors. On the other hand, the scissor style is stronger and can handle thicker nails.
➡Styptic Powder: This is a must-have in your toolkit. If you accidentally cut into the quick, the styptic powder will help stop the bleeding quickly.
➡Dog Treats: Yes, treats are an essential tool! They serve as a positive reinforcement which helps make the nail clipping experience more pleasant for your Labrador.
➡A Soft Towel or Blanket: You can use it to wrap around your large dog if they are too anxious. There are other special techniques on how to restrain a dog with a towel.
➡A File or Grinder: After clipping your dog’s nails, filing them down prevents sharp edges that could cause injury.
Preparing Your Labrador for Nail Clipping
Setting the right stage is crucial before we dive into clipping your Labrador’s nails. Preparation is key, and it involves creating a calm environment, getting your Labrador accustomed to paw handling, and making the entire experience positive.
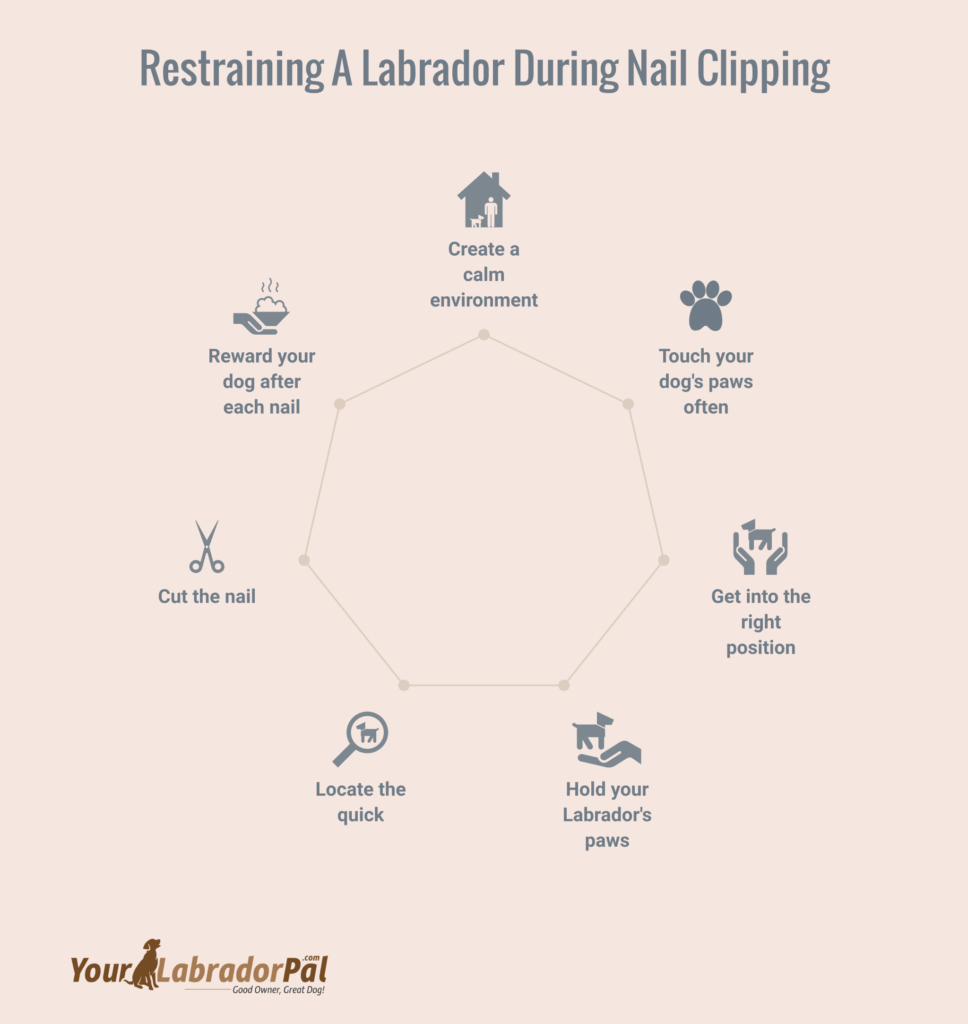
💕Create a Calm Environment for Your Labrador
Creating a calm environment can significantly reduce stress for you and your Labrador during nail clipping. Here are some steps you can take:
➡Choose the Right Time and Place: Choose a quiet time when your Labrador is calm or tired, perhaps after a walk or playtime. The location should be well-lit to see your dog’s nails. It should also be free from distractions like other pets or loud noises.
➡Maintain a Calm Demeanor: Dogs often mirror their owner’s emotions. So, if you’re anxious, your Labrador might become nervous too. Speak softly and soothingly and maintain a relaxed demeanor throughout the process.
➡Use Comfortable Bedding: Make sure your Labrador is comfortable. A soft bed or rug can help, especially if you’ll be restraining your dog on its side for clipping.
💕Get Your Labrador Used to Having Their Paws Touched
Getting your Labrador used for paw handling can make the nail-clipping process easier. Start this training early, ideally when your Labrador is still a puppy. Here’s how:
➡Start with Gentle Paw Massage: Begin gently touching and massaging your Labrador’s paws during calm moments. Do this regularly until your dog seems comfortable with it.
➡Introduce Nail Grinder or Clippers: Once your Labrador is comfortable handling paw, introduce the nail clippers. Let your dog sniff and explore them. You can gently touch the clippers to your dog’s paws without clipping the nails.
➡Praise and Reward: Positive reinforcement goes a long way in training dogs. Praise your Labrador and offer treats whenever they allow you to touch their paws or handle the clippers.
💕Tips for Making Nail Clipping a Positive Experience
Turning nail clipping into a positive experience can make future sessions much smoother. Here are a few tips:
➡Use Treats and Praise: Reward your Labrador with their favorite treats and lots of praise during and after the nail clipping. It can help them associate nail clipping with positive experiences.
➡Take Breaks: Don’t rush to clip all the nails simultaneously, especially if your Labrador is nervous. Take breaks between nails or even paws if needed.
➡Be Patient: This may be a scary experience for your Labrador, so patience is key. If your dog becomes too agitated or scared, stop the session and try again later.
Step-by-step Guide on How To Restrain A Labrador for Nail Clipping
Ensuring a safe and stress-free nail clipping experience for your Labrador requires careful preparation and technique. Here’s a step-by-step guide to help you through the process.
💢Getting Into the Right Position
Positioning is key when it comes to restraining your Labrador for nail clipping. Choose a quiet, well-lit area where your dog feels comfortable. If your Labrador is small, placing them on a table or elevated surface (with supervision) might be easier. For larger Labradors, you may need to sit on the floor next to them or have them lie down on their side.
The goal is to find a position that gives you easy access to their paws while ensuring you and your pet are comfortable. Remember, this should be a calm experience for your Labrador, so avoid positions that make them feel overly restrained or anxious.
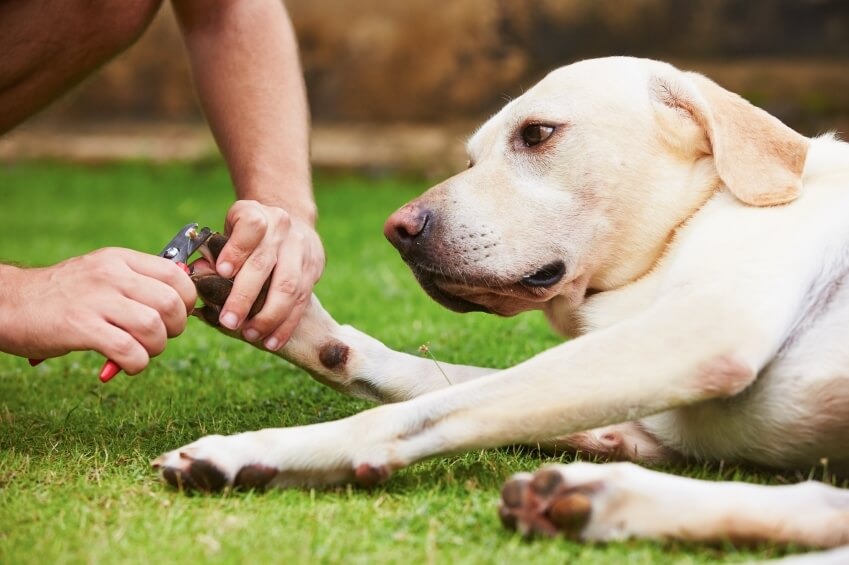
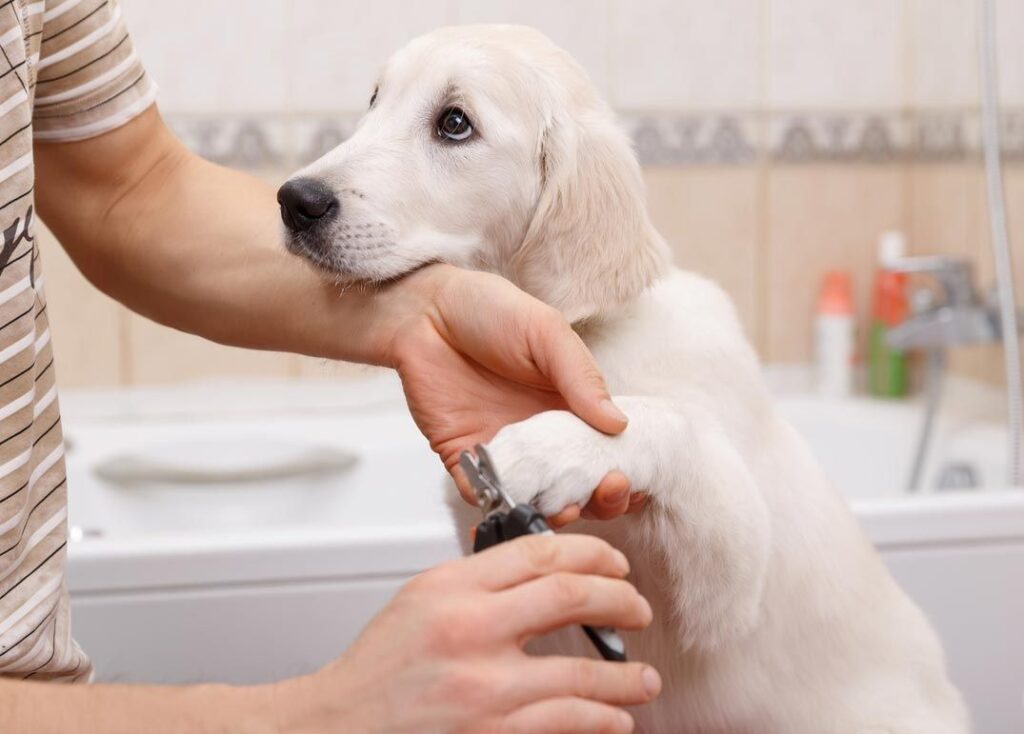
💢Holding Your Labrador’s Paw
Once you’re comfortable, gently hold your Labrador’s paw in your hand. You should hold the paw as if you’re shaking hands with your dog, with your thumb on the pad of the paw and your fingers wrapping the top. This grip allows you to control the movement of the paw and isolate each nail for precise clipping.
Always remember to be gentle. Squeezing too hard could cause discomfort and make your Labrador more resistant to nail clipping.
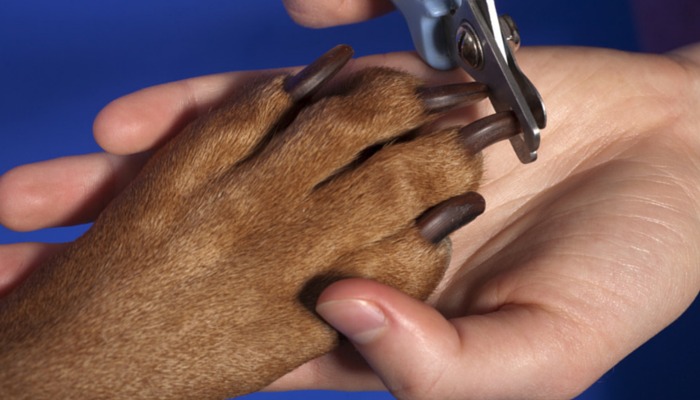
💢Locating the Quick
As discussed earlier, the quick is the sensitive part of your Labrador’s nail. In light-colored nails, it appears as a pinkish area. For darker nails, you might need to use a flashlight against the nail to locate the quick.
If you still can’t identify the quick, it’s advisable to trim the nail little by little, starting from the tip. When you see a small, dark circle at the center of the nail, that’s a sign you’ve reached the quick and should stop cutting.
💢Cutting the Nail
When you locate the quick, it’s time to cut nails. Position the clipper perpendicular to the nail (avoid cutting sideways as it can splinter the nail). Make sure the cutting blade is facing you, not the dog. Start from the tip and cut in a swift, single stroke.
Remember, making several small cuts is better than one large one. If your Labrador has very long nails, don’t try to cut them short all at once. Instead, trim a little bit every week to gradually shorten the nails and allow the quick to recede.
💢Rewarding Your Labrador After Each Nail
Positive reinforcement goes a long way in making nail clipping a pleasant experience for your Labrador. After each nail, reward your dog with praise, petting, or a small treat. It will help them associate nail clipping with positive experiences, making future trims much easier.
Dealing with Potential Problems
Even with the best intentions and careful preparation, accidents can happen during nail clipping. One of the most common mishaps is accidentally cutting into the quick. Here’s how to handle such a situation.
🐾What to Do When You Accidentally Cut the Quick
Firstly, don’t panic. Remember, your Labrador will likely react to your emotional state. If you remain calm, it will help them stay calm too.
Immediately after cutting into the quick, your Labrador might yelp or show signs of discomfort. The nail may also start to bleed. Your first step should be to comfort your pet, reassuring them with a gentle voice and touch.
Next, you’ll need to stop the bleeding. Styptic powder or pencil is a must-have in your pet’s first aid kit. This antihemorrhagic agent helps clot the blood, effectively stopping minor bleeds. If you don’t have styptic powder, cornstarch or flour can be an emergency substitute.
Here’s how to apply it:
- Dip the affected nail into the styptic powder, ensuring the end of the nail is fully covered.
- Apply gentle pressure for a few seconds to allow the powder to clot the blood.
- If the bleeding doesn’t stop within 5 minutes, apply again.
- If the bleeding persists beyond this, it’s time to call your vet for professional advice.
After you’ve managed the immediate issue, it’s important to monitor your Labrador’s behavior and the affected paw over the next few days. Look for signs of infection, such as swelling, redness, or pus. See veterinary attention if you notice any of these symptoms or if your Labrador appears to be in prolonged discomfort.
🐾Tips for Calming a Nervous or Scared Labrador
Remember that you’re not alone if your Labrador is anxious or scared during nail clipping. It is a common issue faced by many pet parents. Here are some practical tips to help soothe your nervous Labrador:
➡Create a calm environment: Start by choosing a quiet, well-lit room. Make sure there are no sudden noises that might startle your Labrador. You can play soft music or use a white noise machine to create a soothing ambiance.
➡Use positive reinforcement: Dogs respond well to positive reinforcement. Reward your Labrador with their favorite treats during and after the nail-clipping session. It will help them associate nail clipping with positive experiences.
➡Go slow: Don’t rush the process. Take your time gently handling your Labrador’s paw, reassuring them with a soothing voice. If your dog pulls away, don’t force them. Instead, give them a break and try again later.
➡Practice handling their paws: Get your Labrador used to having their paws touched. Start by massaging their paws during a calm moment, gradually increasing the duration over time. This practice could make the actual nail-clipping process less stressful.
➡Consider using a blanket or towel: Some dogs feel more secure when swaddled. You can wrap your Labrador in a soft blanket or towel, leaving out the paw you’re working on.
➡Get professional help if needed: If your Labrador continues to be extremely anxious, it might be best to seek professional help. A professional groomer or vet will have the experience and techniques to handle nervous dogs.
Frequently Asked Questions
Q: How often should you clip a Labrador’s nails?
A: The frequency of nail clipping can vary depending on your Labrador’s lifestyle. However, it would be best to trim the nails once they begin to touch the floor or ground when your dog walks, typically around every 3-4 weeks. Dogs who walk more on hard surfaces may naturally wear down their nails and require less frequent trims, while those spending more time on grass or carpet may need more frequent nail clipping. Always consult your vet if you’re unsure about the appropriate frequency for your dog.
Q: What should I do if my Labrador won’t let me clip its nails?
A: If your Labrador doesn’t let you clip its nails, it might be due to fear or anxiety. Try to create a calm environment, use positive reinforcements, and go slow with the process. Practice handling their paws regularly outside of nail clipping sessions to help them get used to it. If your Labrador continues to resist, it may be time to seek help from a professional groomer or veterinarian. They have the experience and techniques to handle dogs comfortably and perform trimming nails perfectly. Remember, forcing the issue could potentially create a negative association with the process and make future trims more difficult.
Q: Is it better to clip or grind a Labrador’s nails?
A: Both clipping and grinding have pros and cons, and the best choice depends on your Labrador’s comfort level and personal preference. Clipping is quick but may split the nail if not done correctly. Grinding takes a bit longer but can result in smoother edges, reducing the risk of scratches. However, the noise and vibration of the grinder may be unsettling to some dogs. It’s important to assess your dog’s temperament and tolerance when deciding on the best method for nail maintenance. Whichever method you choose, remember to take it slow and associate the process with positive reinforcement to ensure a stress-free experience for your Labrador.
Q: How can you tell if your Labrador’s nails are too long?
A: Observing their walk, you can tell if your Labrador’s nails are too long. If the nails are touching the ground and causing the paw to lift or the toe to twist, it’s a clear sign the nails are too long. Another indication is the clicking noise when your dog walks on hard surfaces. You can also visually check – it is time for a trim if the nails are curling over. Always remember long dog’s nails can cause discomfort and lead to problems with your Labrador’s posture and gait. If you’re unsure, it’s best to consult with a professional groomer or vet.
Final Words
Caring for your Labrador involves more than just feeding them well and giving them a loving home. It also includes attending to dog grooming needs, such as regular nail clipping. As daunting as it may initially seem, with patience, consistency and the right technique, you can turn nail clipping from a stressful chore into a routine part of your pet care. Remember, every Labrador is different, and what works for one may not work for another. It’s about finding the right balance and approach that suits your canine buddy best. And along the way, don’t forget to give them lots of love and positive reinforcement!
We hope this guide has provided valuable insights on making nail clipping a less stressful experience for you and your Labrador. We’d love to hear from you if you have any questions, stories, or additional tips. Please share your thoughts and experiences in the comments section below. Your input could be the key to helping another pet parent and their furry friend. Let’s continue to learn and grow together in this wonderful journey of pet parenthood.